14. Interactions
Gaze-based Interactions
Interaction in VR, particularly mobile VR can be done without the use of controllers: the point the user is looking at can be used as a cursor for interacting with objects. For example, if the user looks at a door for a certain amount of time, we can make that door open…
However, interactions can also work in desktop mode. This is particularly important while developing so we don't need to keep running our code in a mobile device.
Showing the cursor
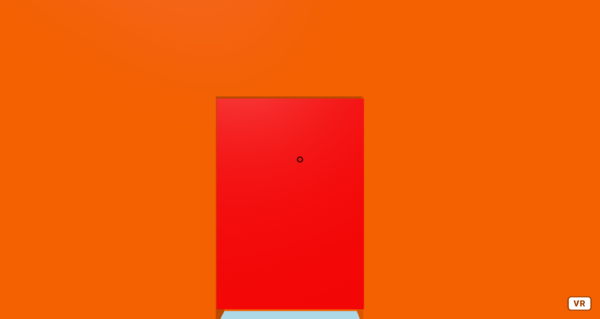
The first thing we need to do is to display a cursor in the centre of the user's view. The cursor acts like a mouse cursor, and the default look is simply a black circle.
To display the cursor, we need to explicitly add a camera primitive and a cursor primitive inside the camera:
<a-camera>
  <a-cursor></a-cursor>
</a-camera>
The <a-camera> primitive is what allows us to move around the scene - it represents the viewpoint inside the scene. We have not used a camera primitive before, but A-Frame inserts one automatically if we do not. By default, the camera 's position is controlled with the 'w', 'a', 's', 'd' keys and its perspective is controlled click-dragging with the mouse.
By inserting a <a-cursor> inside the <a-camera>, the camera will always display a circle centred on the screen.
We should also tell A-Frame to consider the mouse cursor when on desktop mode (so we don't have to point at things with that circular cursor):
<a-scene cursor="rayOrigin: mouse">1100-interactions-01-cursor
[new tab ]
[source ]
 Click to load.
Use keys 'w', 'a', 's', 'd' to move around.
Mouse to look around.
Cursor events
Once we add the <a-cursor> to the camera, it will trigger interaction events that mimick the ones we have on web pages. Note that these are not the same as the real web page events: A-Frame simulates the events to make it easier to work with:
- mouseenter event is fired when the cursor "enters" the primitive, i.e., the cursor transitions from not over to over the entity.
- mouseleave event is fired when the cursor "leaves" the primitive.
- mousedown event is fired when the cursor is over an entity, and the user presses down the mouse button.
- mouseup event is fired when the cursor is over an entity, and the user releases the mouse button.
- click event is fired when the cursor is over an entity for a pre-defined amount of time, or when the cursor is over an entity and the user presses the mouse button.
- fusing event is fired when cursor is over entity and the count-down starts.
Using the events
Once an event is fired, we typically want to change something in our environment. For example, we may want to change the color of an object once the user looks at that object.
To do this, we need to listen to the event and trigger a property change. For that we need to use an external component called Event-Set:
<script src="https://unpkg.com/aframe-event-set-component/dist/aframe-event-set-component.min.js"></script>Event-Set allows us to associate property changes to specific events over an entity.
In example 1100-interactions-02-events, we change the color of the left box when the cursor enters or leaves the primitive. We do that by adding an event-set__? attribute, where the ? is the name of the event. The value of the attribute is the name of the property we wish to change and its new value:
<a-box position="-2 1.6 -2" color="red"
              event-set__mouseenter="color: blue"
              event-set__mouseleave="color: red" ></a-box>
It is easy to make mistakes when writing these Event-Set properties. Notice that event-set has a minus - symbol, but we then use two underscores __ to separate the name of the event.
1100-interactions-02-events
[new tab ]
[source ]
 Click to load.
Use keys 'w', 'a', 's', 'd' to move around.
Mouse to look around.
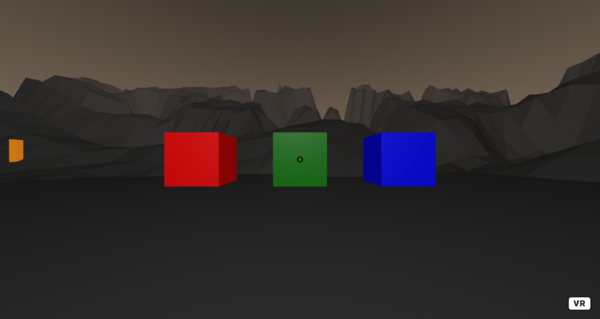
Targetting other primitives
When interacting with an object we can cause changes to other objects as well. We do that by defining the _target property on the event_set__? attribute. To target a primitive we must first assign it an id. In the example, we give the first box an id of "redbox" (id="redbox") and the second box an id of "greenbox". In the mouseenter event for the redbox, notice how we target the greenbox and change its height to 1:
     <a-box
        id="redbox"
        width="0.5"
        height="0.5"
        depth="0.5"
        position="-1 1.6 -2"
        color="red"
        event-set__mouseenter="_target:#greenbox; height: 1"
        event-set__mouseleave="_target:#greenbox; height: 0.5"
      ></a-box>

      <a-box
        id="greenbox"
        width="0.5"
        height="0.5"
        depth="0.5"
        position="0 1.6 -2"
        color="green"
        event-set__mouseenter="_target:#bluebox; height: 1"
        event-set__mouseleave="_target:#bluebox; height: 0.5"
></a-box>1100-interactions-04-events-targets
[new tab ]
[source ]
 Click to load.
Use keys 'w', 'a', 's', 'd' to move around.
Mouse to look around.
A few typical behaviours
Show/hide
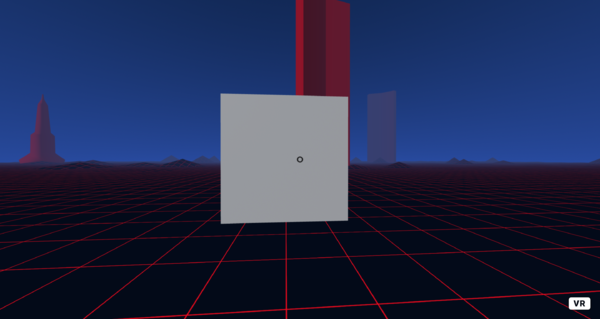
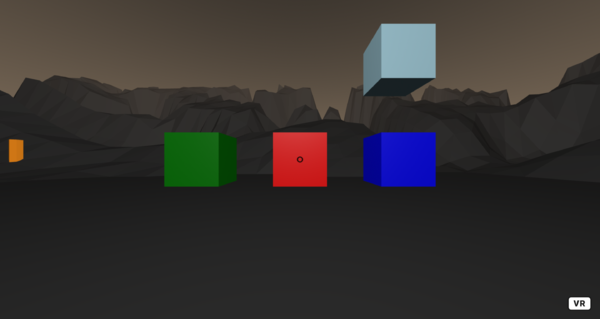
Example 1100-interactions-05-events-showhide shows some common patterns we may wish to apply regarding showing and hiding objects.
The green box on the left is visible but we hide it when the cursor enters; we again make it visible when the cursor leaves. This is done with the visible: false or visible: true properties.
For the red box on the center we change only its opacity instead of making it completely visible or invisible.
For the blue box on the right, we use it to display another initially invisible box. The light blue box on top of the blue box is initially invisible (visible="false"); when we click on the blue box, we set the visibility of the light blue box to visible. Notice the use of the _target in the click event for the blue box:
event-set__click="_target:#topbox; visible: true"1100-interactions-05-events-showhide
[new tab ]
[source ]
 Click to load.
Use keys 'w', 'a', 's', 'd' to move around.
Mouse to look around.
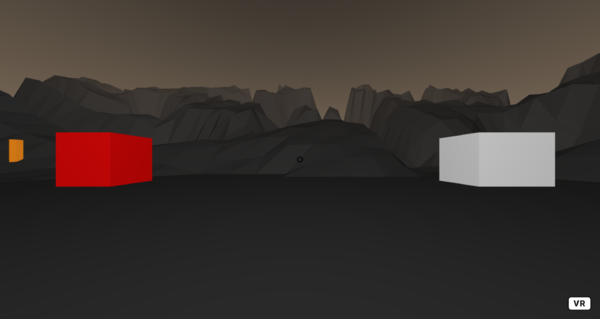
Change texture
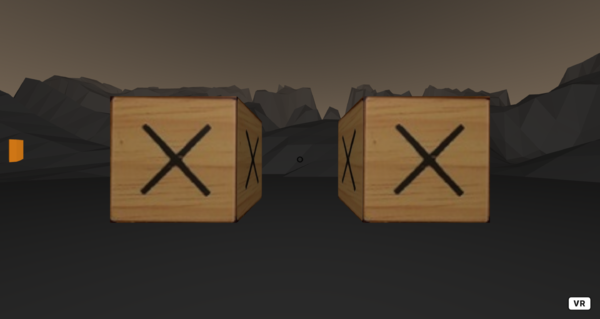
Example 1100-interactions-06-events-changetexture shows how to change the texture of an object in response to user interactions. In the left box, we change the texture when the cursor enters or leaves the box. In the right box we change the texture permanently when the user clicks on the box. Notice how we simply use the Event-Set component to change the src attribute that is used to define the texture through the <a-assets>.
1100-interactions-06-events-changetexture
[new tab ]
[source ]
 Click to load.
Use keys 'w', 'a', 's', 'd' to move around.
Mouse to look around.
Change shape
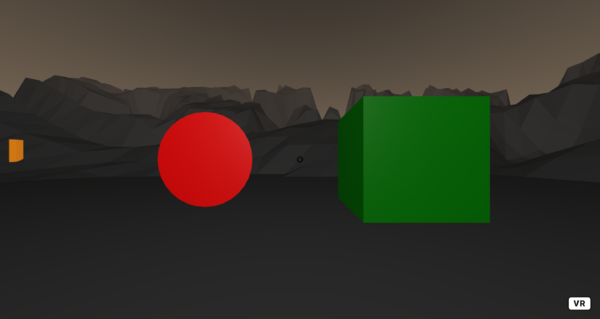
Example 1100-interactions-07-events-changeshape shows how to change the original shape of a primitive. The left box is changed to a sphere and the right box is changed to a cylinder. Notice how this is by by using geometry.primitive:
event-set__click="geometry.primitive: circle; geometry.radius:0.5"1100-interactions-07-events-changeshape
[new tab ]
[source ]
 Click to load.
Use keys 'w', 'a', 's', 'd' to move around.
Mouse to look around.
Rotate
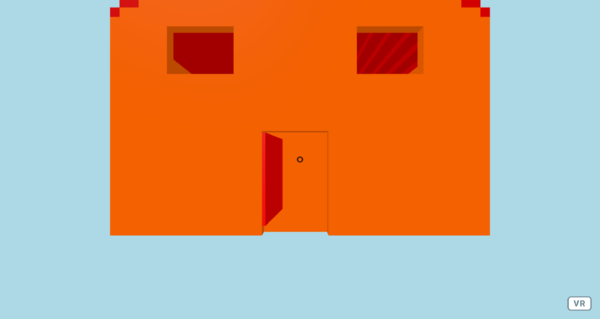
Example 1100-interactions-08-events-rotate shows how to combine an OBJ model with a simple interaction: clicking the door will open it. This is done by creating a generic entity inside which we place a box. This is necessary so that we can rotate the door by its "hinges" instead of rotating it by the center. We adjust the location of the door to match the OBJ model (created with Magica Voxel).
1100-interactions-08-events-rotate
[new tab ]
[source ]
 Click to load.
Use keys 'w', 'a', 's', 'd' to move around.
Mouse to look around.
Proximity
1100-interactions-09-events-proximity
[new tab ]
[source ]
 Click to load.
Use keys 'w', 'a', 's', 'd' to move around.
Mouse to look around.
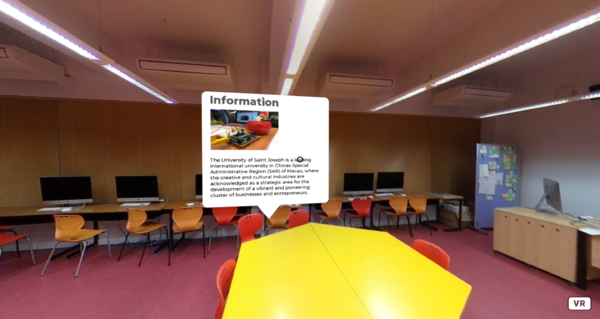
Interactive Info panel
1100-interactions-12-360infopanel
[new tab ]
[source ]
 Click to load.
Use keys 'w', 'a', 's', 'd' to move around.
Mouse to look around.
Controllers
For desktop VR, it is common to use controllers.
You will need to run the following examples on a Quest or similar device to be able to see and use the controllers.
Alternatively, you can install an WebXR emulator on your browser, which allows you to simulate the position of a VR headset and controllers (or hand tracking). For Google Chrome, you can try the Immersive Web Emulator https://chromewebstore.google.com/detail/cgffilbpcibhmcfbgggfhfolhkfbhmik?hl=en
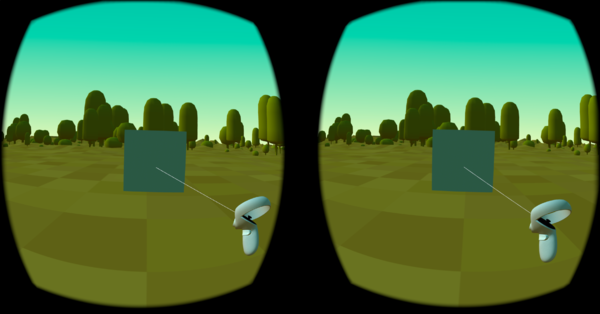
Laser control
We can take advantage of these controllers in a simple way by using the A-Frame Laser Controller which is a virtual laser that shoots from the users hands and mimics the mouse events when intersecting with objects.
To add this laser controller, we must add an entity to our scene:
<a-entity laser-controls="hand: right" ></a-entity>The hand property specifies which physical controller will be used to shoot the laser from.
1100-interactions-10-laser-controller
[new tab ]
[source ]
 Click to load.
Use keys 'w', 'a', 's', 'd' to move around.
Mouse to look around.
Hand model
It is also possible to represent the controls as 3D animated hand models. These hand-controls provide gesture based events, although they are triggered on the hand models themselves and, hence, are not straightforward to use.
For that we add the attribute hand-controls to the entity.
In example 1100-interactions-11-hands-models, we specify that the 3D model to show for the right hand controller is the 3D model of the right hand (hand-controls="hand: right").
We can also specify the color for the hand model, and the style for the hand's model (toon, lowPoly, highPoly).
  <a-entity id="leftHand"  hand-controls="hand: left; handModelStyle: toon; color: #ffcccc"></a-entity>
<a-entity id="rightHand" hand-controls="hand: right;"> </a-entity>1100-interactions-11-hands-models
[new tab ]
[source ]
 Click to load.
Use keys 'w', 'a', 's', 'd' to move around.
Mouse to look around.
Although it should be possible to combine hand-controls and laser-controls in the same entity and scene, it seems there are incompatibilities between
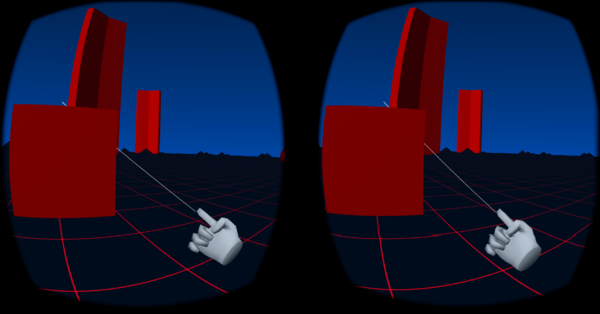
the two components. In example 1100-interactions-12-hands-laser, I show how it is possible to add a laser to the hand when a pointing gesture is made, allowing it
to be used to select objects in the scene. This example makes use of additional components that you can read about in Chapter 22.
1100-interactions-12-hands-laser
[new tab ]
[source ]
 Click to load.
Use keys 'w', 'a', 's', 'd' to move around.
Mouse to look around.
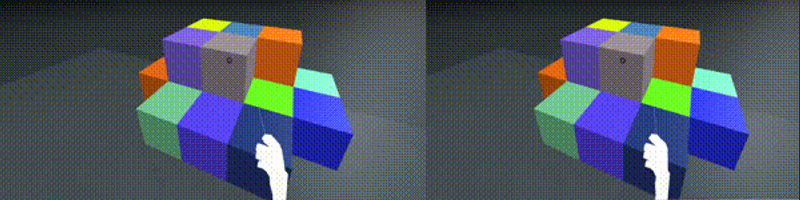
Manipulating objects
We can easily make objects manipulable by using the laser-manipulation external component.
The script for this component is:
<script src="https://cdn.jsdelivr.net/npm/aframe-laser-manipulation@0.3.0/dist/laser-manipulation.min.js"></script>We apply this component to the entity that has the laser-controls:
 <a-entity id="rhand"
            laser-controls="hand: right"

            laser-manipulation
            raycaster="objects: [movable]"
            thumbstick-states__right="controller:#rhand;
                                    tBindings:moving-in,moving-out,rotating-y-plus,rotating-y-minus;
                                    tgBindings:rotating-x-plus,rotating-x-minus,rotating-y-plus,rotating-y-minus">
            </a-entity>
Usually, we also configure the internal raycaster component so that the laser only affects the objects we want to. In this example, the laser will only affect the objects with the movable attribute.
The laser-manipulation external component also comes with a thumbstick-states component that can be used to define the behaviour of the joystick and grip button of the controller.
To "grab" an object, we point the laser and press the trigger button on the controller. We can then use the joystick to bring the object closer or farther way.
By pressing the grip button, we can further rotate the object with the joystick in different axis.
1100-interactions-12-lasermanipulation
[new tab ]
[source ]
 Click to load.
Use keys 'w', 'a', 's', 'd' to move around.
Mouse to look around.
Hand tracking
The examples in the previous section made use of controllers. Although users see a 3D model of a hand, that model is actually responding to the position and a few actions over the corresponding physical controller.
It is, however, possible to take advantage of natural hand tracking provided by some VR devices. These devices can track your hands and allow you to more naturally interact in VR.
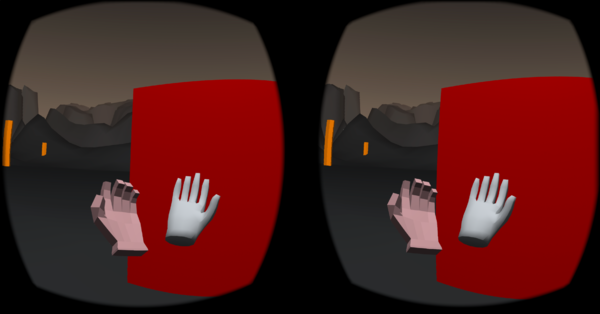
A-Frame supports hand tracking through the hand-tracking-controls component. This component is used in a similar fashion to the hand-controls. In addition to specifying to which hand each entity will be assigned to, you can also specify the type (modelStyle property) of 3D model to use (mesh, or dots -- the default is mesh), and the color of the 3D model (modelColor property).
  <a-entity id="leftHand" hand-tracking-controls="hand: left; modelStyle: mesh"></a-entity>
  <a-entity id="rightHand"  hand-tracking-controls="hand: right; modelStyle: dots"> </a-entity>
Example 1100-interactions-13-hand-tracking shows a basic use of the hand-tracking-controls component. It also shows how the different 3D hand models look (the left hand is assigned the mesh model, while the right hand is assigned the dots model).
1100-interactions-13-hand-tracking
[new tab ]
[source ]
Use keys 'w', 'a', 's', 'd' to move around.
Mouse to look around.
Pinching
Unfortunately, there are no default interactions provided by the hand-tracking-controls component. This component triggers a few events related to the pinch gesture (using your thumb and index finger together), but these events are triggered on the hands' entities themselves and are, thus, not directly useful.
We can, however, use an informal component (pinchable.js) to trigger these events on entities that are intersected by our fingers. Example 1100-interactions-14-hand-tracking-pinch, shows how we can use these pinch gestures to select objects.
Notice that you need to include this component in your project:
<script src="https://aframe-course.glitch.me/examples/pinchable.js"></script>1100-interactions-14-hand-tracking-pinch
[new tab ]
[source ]
Use keys 'w', 'a', 's', 'd' to move around.
Mouse to look around.
The pinchable component triggers pinchedstarted and pinchedended events.
Touching
1100-interactions-16-hand-tracking-touching
[new tab ]
[source ]
Use keys 'w', 'a', 's', 'd' to move around.
Mouse to look around.
Grabbing
It is also possible to allow users to grab and move objects with their hands by including the hand-tracking-grab-controls in the entity that represents the user's hands:
<a-entity id="rightHand" hand-tracking-grab-controls="hand: right;"> </a-entity>and then adding the grabbable component to the objects that we wish to allow users to be able to grab and move:
 <a-box
  grabbable

  scale="0.1 0.1 0.1"
  position="0 1 -0.5"
  color="red"
></a-box>1100-interactions-15-hand-tracking-grab
[new tab ]
[source ]
Use keys 'w', 'a', 's', 'd' to move around.
Mouse to look around.
By itself, grabbing and moving an object may not be very interesting from the point of view of interactivity in the virtual environment. However, it is possible to combine grabbing an object with detecting if that object is intersecting with another. This could then be used to trigger additional actions.
To detecting object intersections, we can use the aabb-collider component, which needs its own script:
<script src="https://unpkg.com/aframe-aabb-collider-component@3.2.2/dist/aframe-aabb-collider-component.min.js"></script>1100-interactions-17-hand-tracking-colliders-object
[new tab ]
[source ]
Use keys 'w', 'a', 's', 'd' to move around.
Mouse to look around.
Exercises
Interactions-01
Use the following code as the basis, and add interactions to the red and green boxes so that clicking on them will turn the spotlight off and on (intensity set to zero, or one). The red box should turn off the light, the green box should turn it on.
<!DOCTYPE html>
<html>
  <head>
    <title>04-environments-01 </title>
    <script src="https://aframe.io/releases/1.0.4/aframe.min.js"></script>
    <script src="https://unpkg.com/aframe-environment-component/dist/aframe-environment-component.min.js"></script>
    <script src="https://unpkg.com/aframe-event-set-component/dist/aframe-event-set-component.min.js"></script>
  </head>
  <body>
    <a-scene cursor="rayOrigin: mouse" >

      <a-box position="0 0.5 -3" width="2" depth="1.5" color="brown"></a-box>
      <a-box position="0.9 1.05 -2.3" height="0.1" width="0.1" depth="0.1" color="green"  ></a-box>
      <a-box position="-0.9 1.05 -2.3" height="0.1" width="0.1" depth="0.1" color="red" ></a-box>

      <a-cone position="0.694 1.6 -3.5" rotation="-20 0 -20" height="0.3" radius-bottom="0.2" color="yellow">
        <a-light id="spotlight" angle="40" type="spot" intensity="1" rotation="-100 0 -10"></a-light>
      </a-cone>

      <a-light type="ambient" intensity="0.7"></a-light>

      <a-camera>
        <a-cursor></a-cursor>
      </a-camera>
    </a-scene>
  </body>
</html> Interactions-02
Create a simple scene with a plane (<a-plane>) to work as a mirror (it will not really reflect). Initially the mirror should be white; when the user looks (mousenter) at the mirror it should show a picture of you (change the texture).