12. Lights
Lighting is a fundamental aspect of a 3-dimensional environment. After all, without light we would not see anything. In the previous chapter, we have not worried about lighting because A-Frame provides it by default. However, if we want to create a richer environment, we will need to add and configure lights beyond the default ones.
Lights are computationally expensive so be conservative in your use of lights!
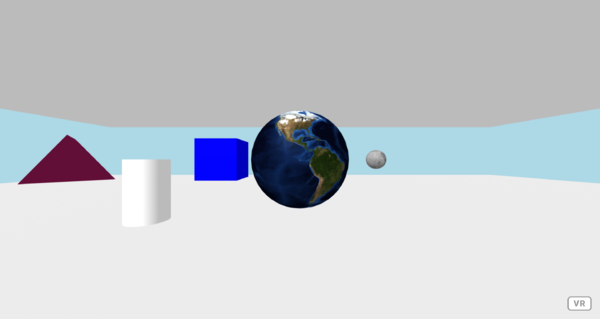
By default, if we don't explicitly add a light to our scene, A-Frame will add the following:
<a-light type="ambient" color="#BBB"></a-light>

<a-light
  type="directional"
  color="#FFF"
  intensity="0.6"
  position="-0.5 1 1"
></a-light>
These correspond to an ambient light with light gray color and a directional light positioned just behind the user, a bit to the left.
0800-lights-01-default
– Default lights in A-Frame [new tab ]
[source ]
 Click to load.
Use keys 'w', 'a', 's', 'd' to move around.
Mouse to look around.
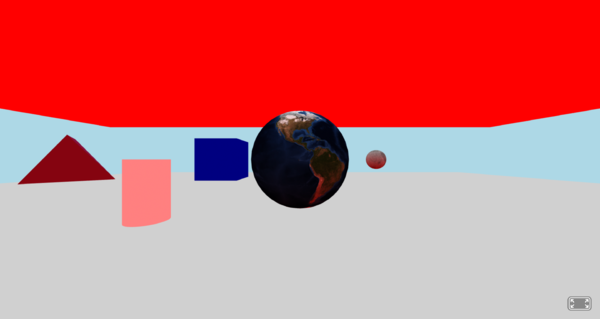
There are many other light types in A-Frame.
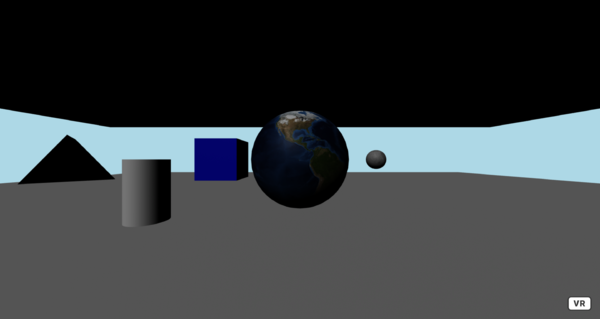
Ambient light ☀️
Ambient light is light that affects every object in a scene. Ambient light has no specific location in space, it is present everywhere.
When we add a light to our scene, A-Frame will not add the default ones. So if we add:
<a-light id="ambientLight" type="ambient" color="#BBB"> </a-light>Only an ambient light will exist in the scene.
0800-lights-02-ambient
– A scene with only ambient light [new tab ]
[source ]
 Click to load.
Use keys 'w', 'a', 's', 'd' to move around.
Mouse to look around.
Notice that, because ambient light is everywere, it does not cause shadows, making it hard to perceive the 3D form of the objects – they all look 2D in Example 0800-lights-02-ambient.
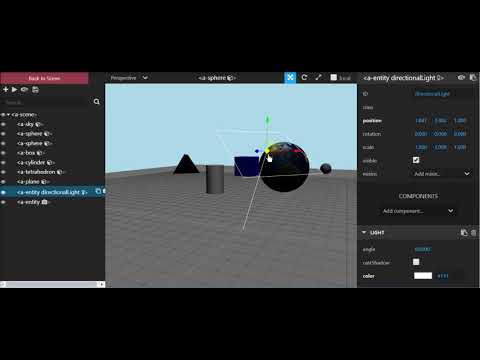
Controlling lights is difficult to do because it is hard to predict their effect. It is best to use the Visual Inspector to manipulate the light parameters:
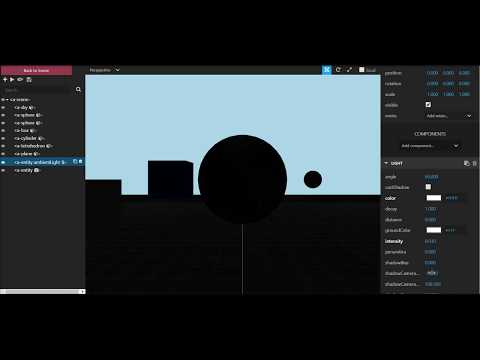
Its useful to assign an id to each light to make it easier to identify in the Visual Inspector. In the video, you see that it is easy to locate the ambient light in the scene outline panel on the left because it shows the id "ambientLight". This is particularly useful when you many several lights.
Use the Visual Inspector (<ctrl> + <alt> + i) to change the color and intensity of the ambient light in 0800-lights-02-ambient
Directional light
A directional light represents a light source that is very far away and so light comes from a direction but does not have a specific location in space.
Although the light is directional, the way to specify the direction in A-Frame is by specifying a position. The light source's direction will be formed by the line that connects the position to the origin (0, 0,0)
A direction light is created with:
<a-light
  id="directionalLight"
  type="directional"
  color="#FFF"
  intensity="0.6"
  position="-0.5 1 1"
></a-light>0800-lights-03-directional
– A scene with only one directional light [new tab ]
[source ]
 Click to load.
Use keys 'w', 'a', 's', 'd' to move around.
Mouse to look around.
The Visual Inspector is particularly useful to manipule the directional light position and immediately see the effect.
Note how even when the directional light is positioned below the "ground" plane it still shines light on the objects above. By default, objects don't block the light to other objects, i.e., they don't cast a shadow -- unless we explicitly tell them to.
Use the Visual Inspector (<ctrl> + <alt> + i) to change the position of the directional light in example 0800-lights-03-directional. Try changing its color also.
Hemisphere light
A hemisphere light is like a directional light but with two directions one from above and one from below. Like the directional light, we specify the position for the light, but what matters is the direction from the position of the light to (0, 0, 0). Unlike the directional light, for the hemisphere, we need to specify two colors: one for the color of the light from above and another for the color of the light from below. Notice that the light does not emanate from the position of the light, rather it emanates from two distant points.
 <a-light
        id="hemispherelight"
        position="0 2 0"
        type="hemisphere"
        color="white"
        ground-color="red"
        intensity="1"
></a-light>0800-lights-04-hemisphere
– A scene with only one hemisphere light [new tab ]
[source ]
 Click to load.
Use keys 'w', 'a', 's', 'd' to move around.
Mouse to look around.
It is easier to understand the behaviour of the hemisphere light with the Visual Inspector.
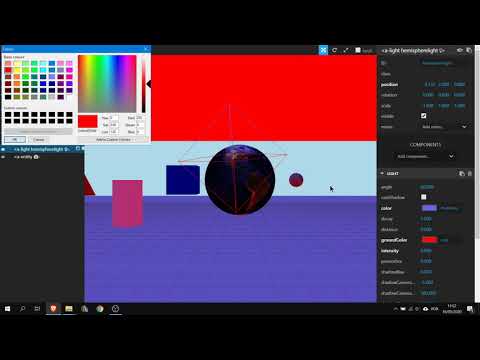
Use the Visual Inspector (<ctrl> + <alt> + i) to change the colors and position of the hemisphere light in example 0800-lights-04-hemisphere.
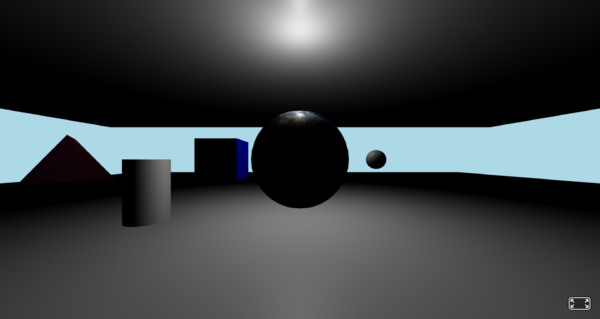
Point light 💡
A point light is like a bulb: it has a position and emits light omnidirectionally. The light intensity of a point light decreases with the distance to the point light. Besides the color of the light and intensity of the light, we control the decay – a value that represents how much the light intensity decreases with distance; and distance – the maximum distance the point light will reach: objects beyond this distance will not receive any light.
<a-light
  id="pointlight"
  position="0 5 -5"
  type="point"
  color="white"
  intensity="1"
  decay="1"
  distance="10"
></a-light>0800-lights-05-point
– A scene with only one point light [new tab ]
[source ]
 Click to load.
Use keys 'w', 'a', 's', 'd' to move around.
Mouse to look around.
The Visual Inspector can be used to fine tune the values of a point light.
Use the Visual Inspector (<ctrl> + <alt> + i) to change the position and distance of the point light in example 0800-lights-05-point.
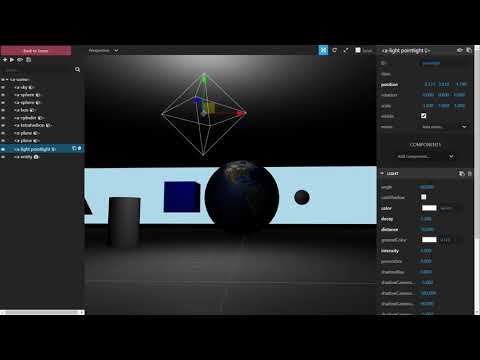
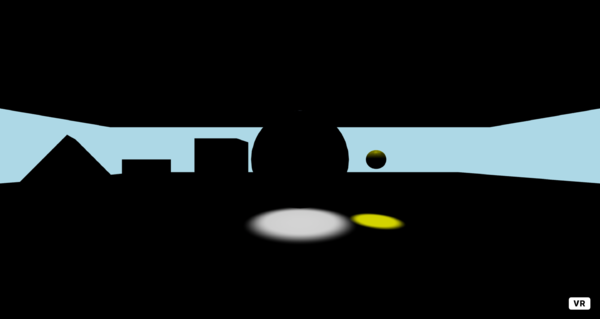
Spot light 🔦
A spotlight is like… a spotlight or a flashlight that you shine somewhere. It has a position and an orientation and will emit light in a cone-shaped fashion. You control the position and rotation to define where the spotlight is shining. The default orientation for the spotlight is horizontal facing away from you (like you were holding a flashlight straight). To make it shine downwards, we can rotate -90 degrees:
<a-light
      id="spotlight"
      position="0 4 -5"
      rotation="-90 0 0"
      type="spot"
      color="white"
      intensity="1"
      angle="20"
      penumbra="0.4"
></a-light>
We can also control the intensity (and decay if we set a distance different from zero). Additionally, we can define the angle which represents how wide the light cone is, and also the penumbra which defines how light should decay from the center to the periphery of the cone.
In some situations, we want our spotlight to shine on a specific object in the scene. To make it easier to direct the spotlight, instead of defining the rotation, we can define a target with the id of the object we want to target. In the following, we are targeting the sphere that represents the moon. Notice how we assigned the id=moon to the sphere, and then used target="#moon":
 <a-sphere
        id="moon"
        position="2 1.6 -5"
        radius="0.25"
        src="#moonPhoto"
></a-sphere>

<a-light
    id="spotlighttargeted"
    position="2 4 -5"
    target="#moon"
    type="spot"
    color="yellow"
    intensity="1"
    angle="10"
    penumbra="0.4"
></a-light>0800-lights-06-spotlight
[new tab ]
[source ]
 Click to load.
Use keys 'w', 'a', 's', 'd' to move around.
Mouse to look around.
The following video illustrates some of the properties of spotlights using the Visual Inspector.
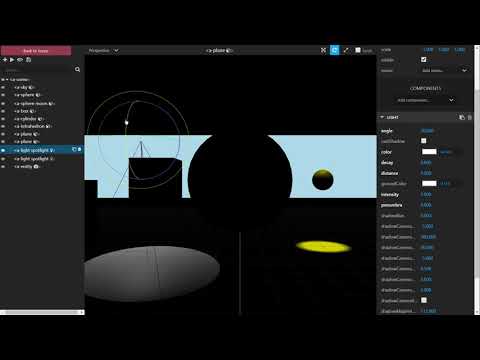
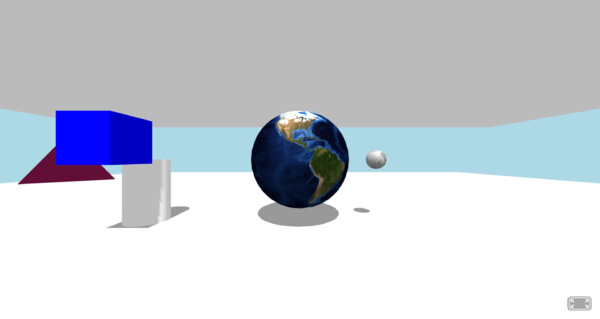
Shadows 👥
In all the previous examples so far the objects in our scenes do not cast shadows on other objects. This results in unrealistic environments. Let's see how we can add shadows to our scene.
Shadows are computationally expensive. Add them only to the most relevant objects and configure them correctly!
Only the point, spot, and directional lights can cast shadows on objects, so it only makes sense to activate shadows on these. In order to add shadows to our scene we need to tell which objects will receive shadows, which objects will cast shadows on other objects, and which lights will cause shadows.
To tell which objects receive and cast shadows, we add to those objects the shadow component. For example, if we want the ground plane from our previous examples to receive shadows, we add shadow="receive: true":
 <!-- ground -->
<a-plane
  id="ground"
  position="0 0 -4"
  rotation="-90 0 0"
  width="40"
  height="40"
  color="#d0d0d0"
  shadow="receive: true"
></a-plane>
Notice that for this object, it only makes sense for it to receive shadows, but not cast any shadow because we would not be able to see any shadow created by the ground plane…
In the cylinder, we may wish to cast and receive shadows:
<a-cylinder
    position="-4 0.8 -5"
    height="1.6"
    radius="0.5"
    shadow="cast: true; receive:true"
></a-cylinder>
After we configure our objects, we need to tell which light will cause shadows and configure the space on which the light will cause the shadows. To tell the directional light to cause shadows, we add the light="castShadow: true" property.
<a-light
id="directionalLight"
type="directional"
color="#FFF"
position="-0.5 1 1"
light="castShadow: true "
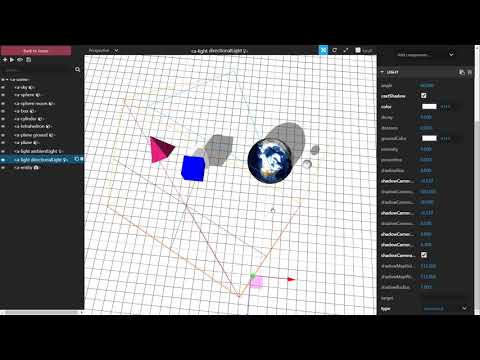
></a-light>However this is not enough. Because shadows take a lot of processing to be calculated, A-Frame forces us to define the volume on which shadows will be cast. This is done with the concept of shadow camera: imagine the light source has a video camera on which we can adjust the lens aperture, how far and how close it sees. Shadows will only be created by this light in the volume visible with this camera. The exact camera parameters depend on the type of light, but for the directional light, we can adjust the shadowCameraBottom plane, the shadowCameraLeft plane, the shadowCameraRight plane and the shadowCameraTop plane:
<a-light
    id="directionalLight"
    type="directional"
    color="#FFF"
    position="-0.5 1 1"
    light="castShadow:  true;
        shadowCameraTop:  5.7;
        shadowCameraRight:  0.06;
        shadowCameraBottom:  -0.53;
        shadowCameraLeft:  -8.31; "
></a-light>0800-lights-07-shadows
[new tab ]
[source ]
 Click to load.
Use keys 'w', 'a', 's', 'd' to move around.
Mouse to look around.
These values can be easily extracted with the Visual Inspector:
Environment maps
The idea behind environment maps is that the background of the scene can be reflected by shiny objects in the scene.
For instance, if we have a shiny metal sphere in the scene, it should reflect whatever background we have.
One way to simulate (approximately) this is to use environment cube maps. Usually, this starts with a 360º photo that we use as a background (texture) in a a-sky.
If you have a 360º photo, you can convert it to a cube map using a tool such as this: https://hdri-to-cubemap-converter.vercel.app/
We saw in another chapter (https://aframe-course.glitch.me/0600-portals.html#taking-equirectangular-shots-of-a-scene) that you can take 360º shots of your own A-Frame environment. So you could compose an A-Frame scene with objects and take a 360º photo to apply that photo as an environment map for some of the 3D models in that same scene.
We can then create a environemt cube map using the external component cube-env-map.
A-Frame has a <a-cubemap> primitive but it seems it only applies to A-Frame objects not to imported 3D models.
So here I am using the more general external component.
The cube-env-map component is loaded from:
<script src="https://cdn.jsdelivr.net/gh/donmccurdy/aframe-extras/dist/aframe-extras.min.js"></script>You then apply it to entities with the cube-end-map component:
<a-sphere
          position="-3 1 -2"
          radius="0.5"
          material="metalness:1; roughness:0"
          cube-env-map="path: https://raw.githubusercontent.com/jorgecardoso/aframe-course-resources/refs/heads/master/golden_gate_hills_4k/
/; extension: png; reflectivity: 1 ;">
The path property must end with / and it refers to the folder where the six images that form the environment cube are located. These images must follow a predefined naming:
negx.png,
posx.png,
negy.png,
posy.png,
negz.png,
posz.png,
The file extension does not need to be png. The default is actually jpg, but you can specify the file extension with the extension property, as in the example.
Note that, in order to work, the material needs to be reflective so, if you are applying the cube-env-map to an A-Frame primitive you must also change the material component.
In the following example, the cube-env-map is applied to four spheres and a 3D GLTF model. Notice how it does nothing for the first sphere (leftmost) because we did not change its material.
0800-lights-08-envmap
[new tab ]
[source ]
 Click to load.
Use keys 'w', 'a', 's', 'd' to move around.
Mouse to look around.
Exercises
Lights-01
Create a scene with a white box in position (0, 1.6, -2). Add three point lights in the left, right, and in front of the box. The left light should be yellow, the right right should be red, and the front light should be green (move around to see the sides of the box).
Lights-02
Create a scene with a plane <a-plane> of 5 meters of width, and 2 meters of height.
- Add 3 point lights of different colors in fron of the plane (one near the left edge, another near the center and another near the right edge of the plane).