6. Primitives and Components
Primitives
A-Frame provides various primitives: HTML elements that correspond to simple building blocks for 3D content. A primitive is typically a simple 3D shape which can be created by inserting a specific HTML element inside the scene. In example 0100-primitives-01-position you will see various such primitives – a box, a sphere, a cylinder, a plane, and a sky:
0100-primitives-01-position
[new tab ]
<!DOCTYPE html>
<html>
  <head>
    <title>Primitives - 01 - Position</title>
    <script src="https://aframe.io/releases/1.7.0/aframe.min.js"></script>
  </head>
  <body>
    <a-scene>

      <a-box
        id="box1"
        position="0 2 -2"

        width="1"
        height="0.5"
        depth="2"

        rotation="0 0 0"
        color="red"
      ></a-box>

      <a-sphere
        position="0 1.25 -5"
        radius="1.0"
        color="#EF2D5E"
      ></a-sphere>

      <a-cylinder
        position="1 0.75 -3"
        radius="0.5"
        height="1.5"
        color="#FFC65D"
      ></a-cylinder>

      <a-plane
        position="0 0 -4"
        rotation="-90 0 0"
        width="4"
        height="4"
        color="#7BC8A4"
      ></a-plane>

      <a-sky color="#ECECEC"></a-sky>

    </a-scene>
  </body>
</html>
Each of these HTML elements has a pre-defined 3D shape associated with it. You will notice that all these HTML elements have attributes. In A-Frame, these attributes correspond to components and they allow us to set different properties for the primitives.
Notice that the HTML in the previous example is formatted in a way such that each attribute appears on a new line and the > symbol that closes the opening tag appears in the same line as the closing tag. This is an automatic formatting from Glitch and it makes it easier to read. However it is not mandatory! The first <a-box> element could just have been written as
<a-box id="box1" position="0 2 -2" width="1" height="0.5" depth="2" rotation="0 0 0" color="red"> </a-box>Position
The position component allows us to set the position of the 3D object in 3D space.
0100-primitives-01-position
[new tab ]
[source ]
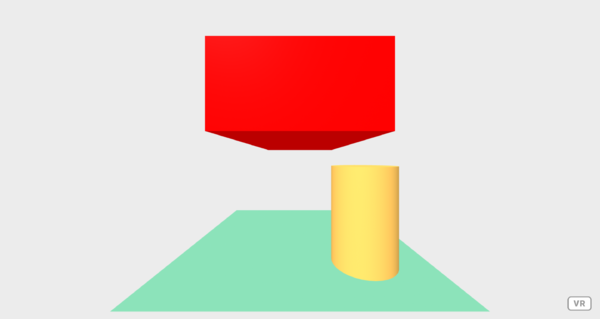 Click to load.
Use keys 'w', 'a', 's', 'd' to move around.
Mouse to look around.
Notice that the position value for the box is "0 2 -2". This means that the box's center is two meters in front of the user (z: -2) and two meters above the ground (y: 2). (In A-Frame it is customary to interpret position and lengths in meters.)
If no position is given, the object will be placed at (0, 0, 0).
It's important to understand that, in A-Frame, the origin (0, 0, 0) is at the user's feet. Also, by default, when vieweing the VE in a mobile or desktop device without positional tracking, the user's eyes will be set at (0, 1.6, 0) – 1.6 meters above the ground.
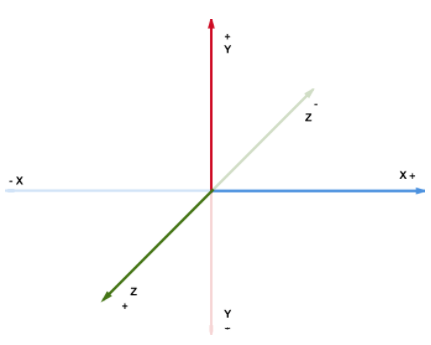
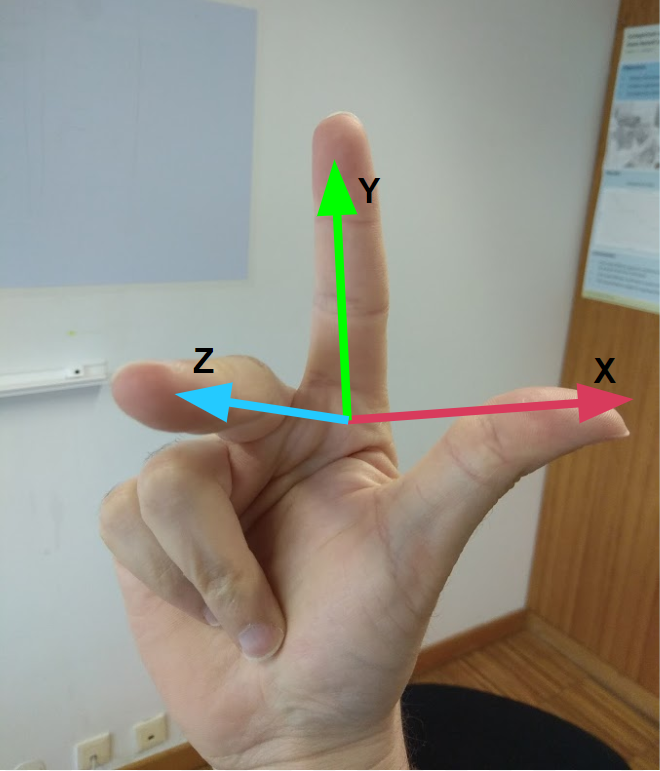
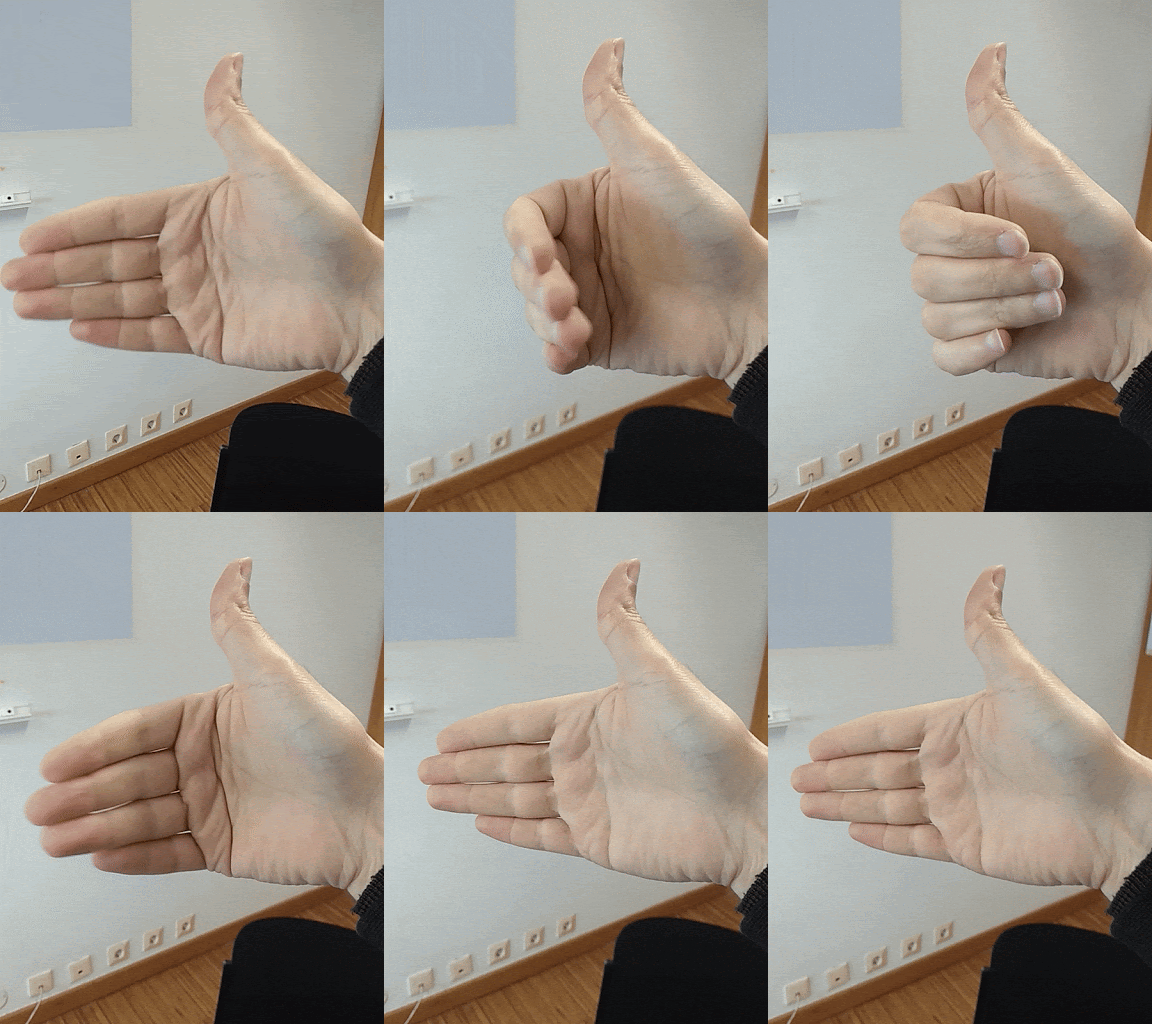
A nice mnemonic to remember the which axis points in what direction is to use your right hand as shown in Figure 2. If your put your thumb, index, and middle finger as in Figure 2 (your middle finger is pointing directly at you) then the x, y, and z axis are aligned with your thumb, index, and middle fingers. The positive direction of the axis points in the direction your fingers are extended to. Notice how it is easy to see that to place something in front of you in A-Frame you need to give it negative values of z!
- Try changing the position so that the box is higher in the screen and further away.
- Add a second box positioned on top of the first.
Size
Several attributes are used to set the final size of a 3D object.
0100-primitives-02-size
[new tab ]
[source ]
 Click to load.
Use keys 'w', 'a', 's', 'd' to move around.
Mouse to look around.
To define the size of a box you can use the width, height, and depth attributes to control the length in the x, y, and z axes. By default, if no size is specified, the box assumes a size of 1 meter wide, 1 meter tall, and 1 meter in depth.
In example 0100-primitives-02-size, notice how our box is now taller:
<a-box
  position="0 2 -2"
  width="1"
  height="3"
  depth="1"
  rotation="0 0 0"
  color="red"
></a-box>
Different primitives may have different attributes to set the size. For example, a sphere's size is defined through it's radius:
<a-sphere position="0 1.25 -5" radius="1.25" color="#EF2D5E"></a-sphere>A cylinder uses height and radius:
<a-cylinder
  position="1 0.75 -3"
  radius="0.5"
  height="1.5"
  color="#FFC65D"
></a-cylinder>
To learn what attributes a given primitive needs for setting its size, you must read the documentation in the A-Frame website.
- In example
0100-primitives-02-size, add a second box that is wider than taller.
Rotation
0100-primitives-03-rotation
[new tab ]
[source ]
 Click to load.
Use keys 'w', 'a', 's', 'd' to move around.
Mouse to look around.
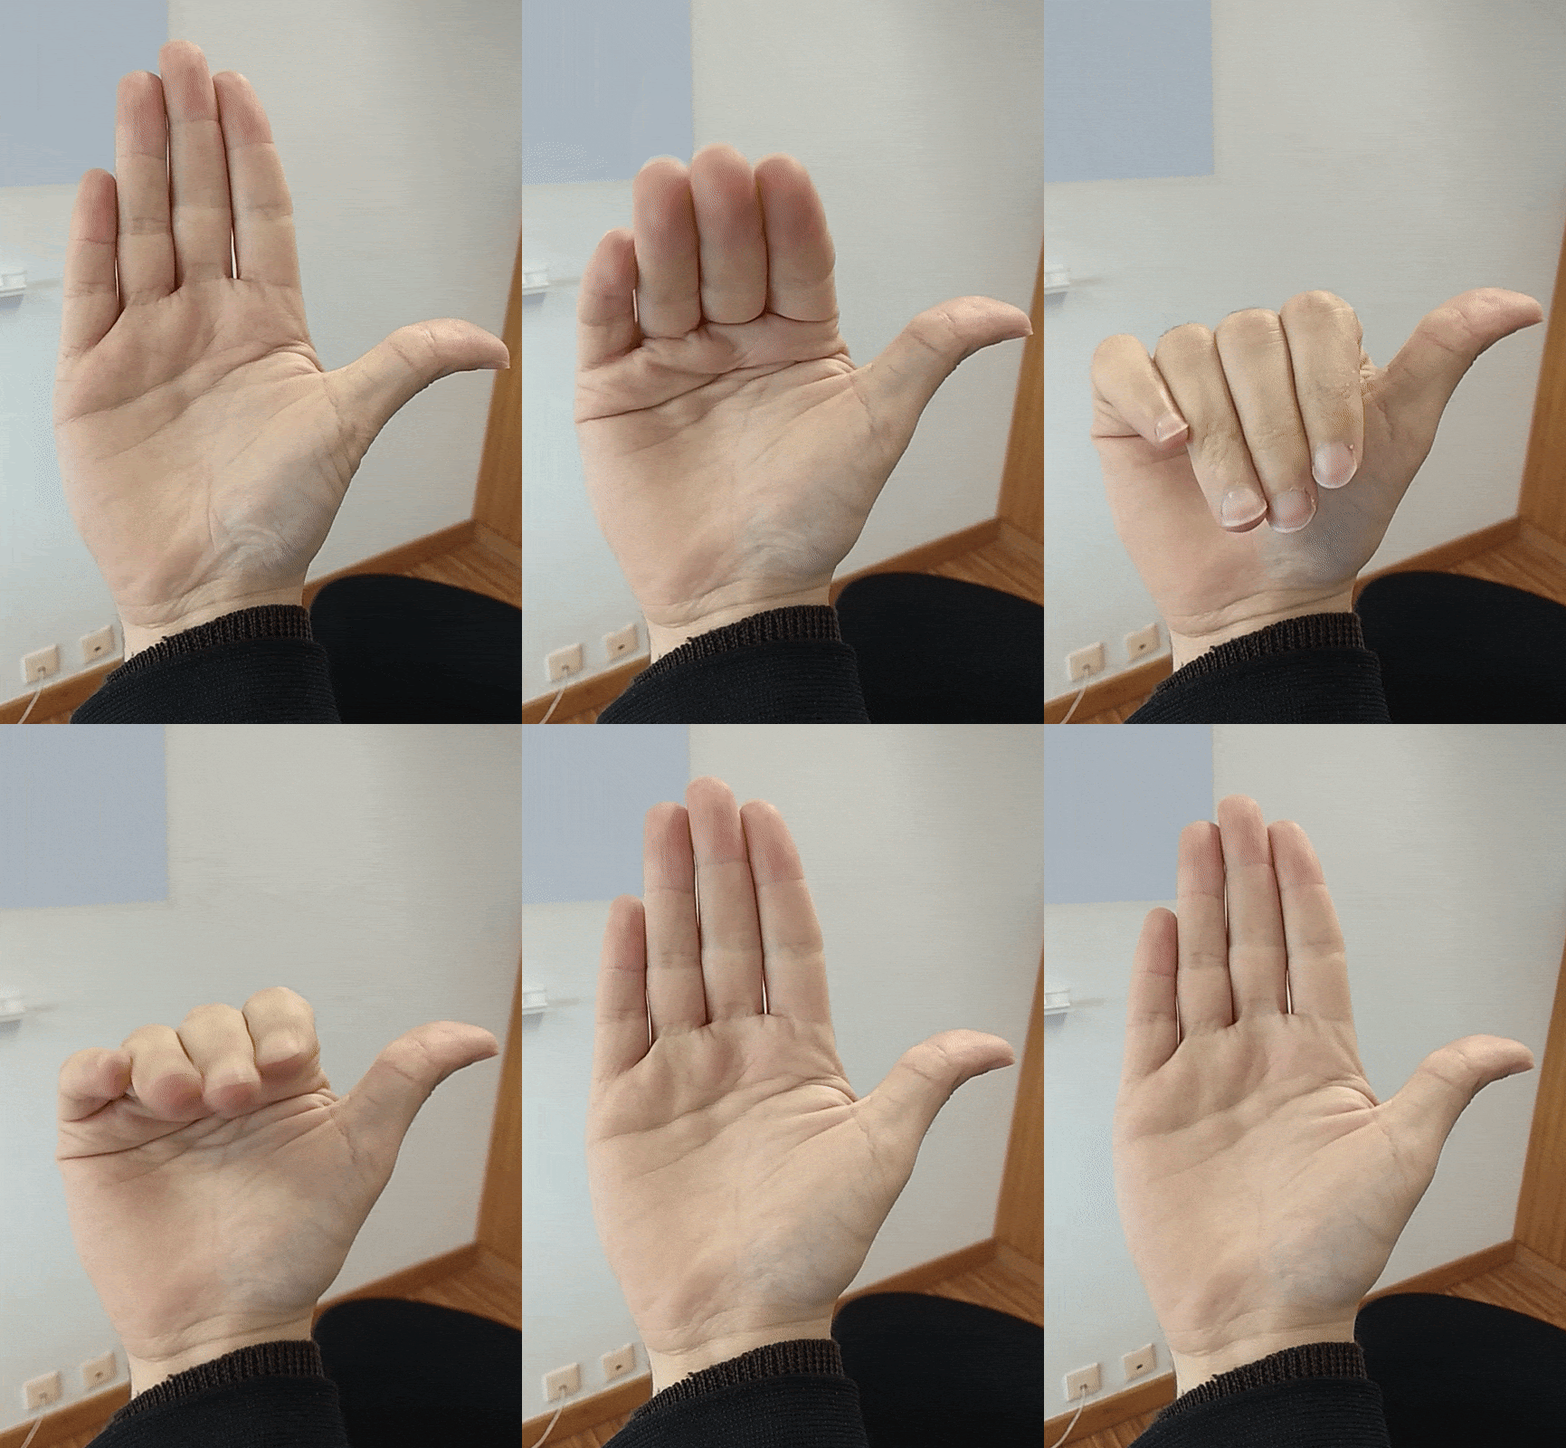
The rotation attribute specifies three values for the rotation around each of the x, y, z axes. In the example, notice how the box is rotated 45º in the x-axis – towards you.
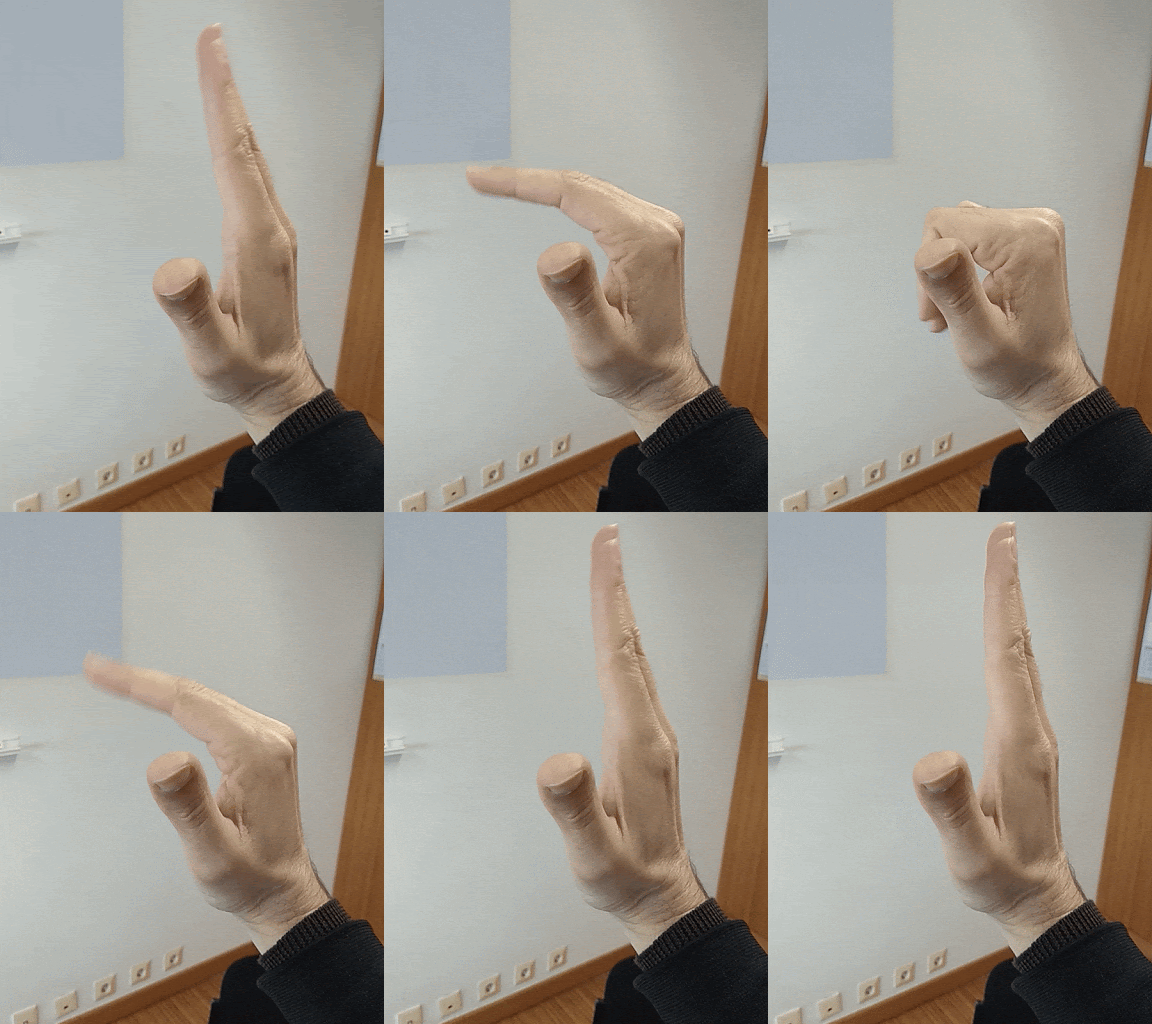
To know in which direction the object will rotate you can use the mnemonics in Figure 3. Use your thumb to point it in the positive direction of the axis you wish to rotate about. Then close your hand; the direction in which your hand closes is the positive rotation.
- Experiment with different rotations in example
0100-primitives-03-rotation. Try adding another box and rotate it in the z-axis.
Scale
0100-primitives-04-scale
[new tab ]
[source ]
 Click to load.
Use keys 'w', 'a', 's', 'd' to move around.
Mouse to look around.
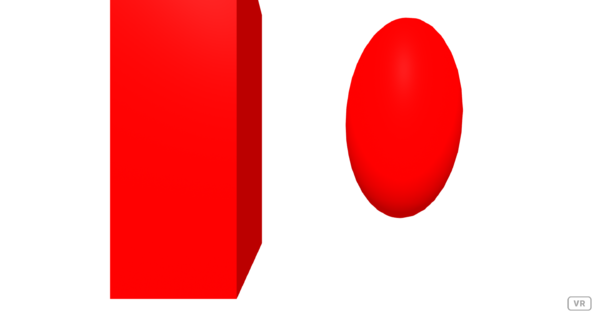
The scale attribute allows us to resize the object along its 3 dimensions independently. The scaling value is multiplied by the dimension of the object, so a scale="1 1 1" does not change the object, while a scale of scale="0 0 0" will make it disappear (zero size).
For some situations scaling is simply an alternative to specifying the dimensions of the object. For instance, in Example 0100-primitives-04-scale, the size of the box is the same as in Example 0100-primitives-02-size but we use scale to multiply the default height of one by three, instead of using height="3".
In other situations, using scale is the only way to achieve the effect. In Example 0100-primitives-04-scale, the sphere is scaled differently in each axis, thus distorting the object, which is no longer a sphere.
Color
0100-primitives-05-color
[new tab ]
[source ]
 Click to load.
Use keys 'w', 'a', 's', 'd' to move around.
Mouse to look around.
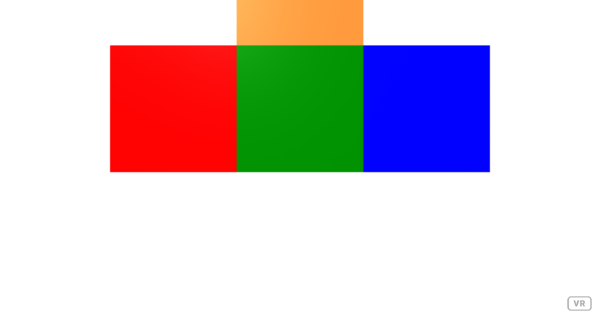
The color attribute allows you to set the color of the primitive. You can use color names such as "red", or "green" for colors that have a pre-defined name. For general colors, you can use the hex format such as #ff8533 (you can use any color picker to find out the hex values, e.g., https://www.w3schools.com/colors/colors_picker.asp )
- In example
0100-primitives-05-color, change the color of the green box to a color chosen from https://www.w3schools.com/colors/colors_picker.asp
Different Primitives
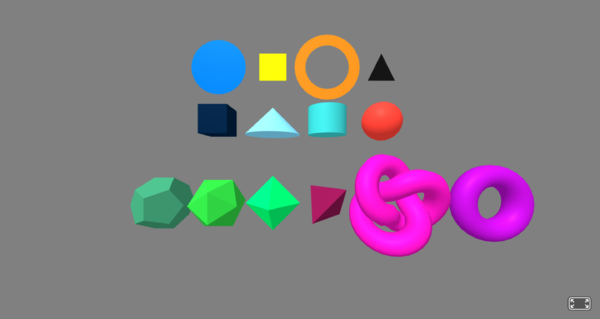
0100-primitives-06-primitives
[new tab ]
[source ]
 Click to load.
Use keys 'w', 'a', 's', 'd' to move around.
Mouse to look around.
In this example, you can see different types of primitives for creating different objects.
Notice how primitives such as the cylinder and sphere have a radius attribute:
<a-sphere position="3 3 -10" radius="0.7" color="#FF4136"></a-sphere>Nesting Primitives
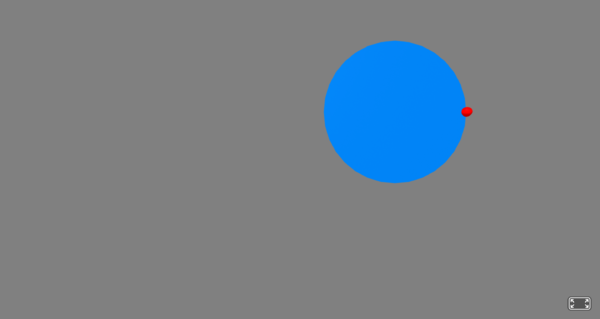
It is possible to place a primitive inside another one. This is helpful when we want to place a 3D object relative to another, instead of placing both in relation to the origin (0, 0, 0). Nested objects are placed relative to their parent objects.
This makes it much easier to create complex objects. As an example, imagine we need to create a circle with a sphere placed in the circumference. Knowing the radius of the circle, we can easily calculate the relative position of the sphere:
<a-circle position="0 1.6 -4" radius="1.5" color="#0074D9">
        <a-sphere position="1.5 0 0" radius="0.1" color="red"> </a-sphere>
      </a-circle>
Notice that we can now move the circle to another position while keeping the sphere correctly placed.
0100-primitives-07-nesting
[new tab ]
[source ]
 Click to load.
Use keys 'w', 'a', 's', 'd' to move around.
Mouse to look around.
- In the example
0100-primitives-07-nestingtry changing the position of the circle and confirm that the sphere is still correctly attached to it
Exercises
Primitives-01
Make a copy of example 0100-primitives-01-position and change it:
- Change the color of the sky (
<a-sky>primitive) to "lightblue". - Enlarge the floor (
<a-plane>primitive), and change its color to "brown". - Add a second cylinder, and rotate it
Primitives-02
Make a new file and:
- Create a scene with 9 colored boxes (each box should be 1m x 1m x 1m) as in the following example:
Primitives-03
Make a new file and:
- Create a scene with 4 boxes to represent walls, and a sphere as in the following example.
- Add a light blue sky.
Primitives-04
Make a scene with a torus, scaled 3x in the x-axis:
Primitives-05
Make a scene with a cube with 1 spheres in each corner of the frontal face. Use nesting!
