9. Environments and Other Components
The functionality present in A-Frame can be extended by external components. Many contributors to A-Frame have created and published components that we can use in our A-Frame scenes. You can find some of those third-party components in the References in this chapter.
In this chapter, we will explore a few to demonstrate how to use these external components and create more complex VR environments.
Loading Components
External components are programmed in JavaScript files that must be loaded into the HTML. This is typically done immediately after including the JavaScript file for the A-Frame framework in the <head> of the HTML:
<head>
    <title>Title</title>
    <script src="https://aframe.io/releases/1.4.0/aframe.min.js"></script>
    <script src="<JavaScript file for the component>"></script>
  </head>
After including the component's JavaScript file, we typicall access its functionality in one of two ways:
- As new components (attributes) that we can attach to A-Frame elements
- As new primitives (new HTML elements)
Environment Component
The Environment component allows us to quickly populate an A-Frame scene with visual elements.
The Environment component is loaded by inserting the following <script> element inside the <head>:
<script src="https://unpkg.com/aframe-environment-component@1.3.7/dist/aframe-environment-component.min.js"></script>After the component is loaded, we can use an <a-entity> element (an <a-entity> is a generic entity in A-Frame without any default geometry) to automatically create large environments by adding the environment attribute.
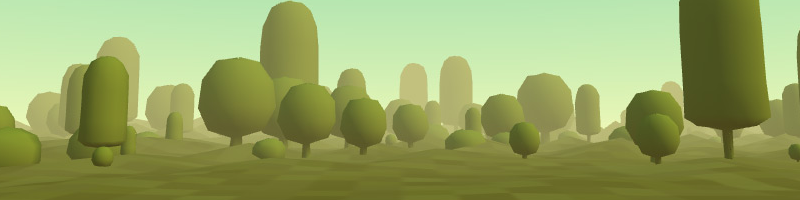
<a-entity environment="preset: <name of the preset>"></a-entity>The name of the preset can be one of: 'none', 'default', 'contact', 'egypt', 'checkerboard', 'forest', 'goaland', 'yavapai', 'goldmine', 'arches', 'threetowers', 'poison', 'tron', 'japan', 'dream', 'volcano', 'starry', 'osiris'.
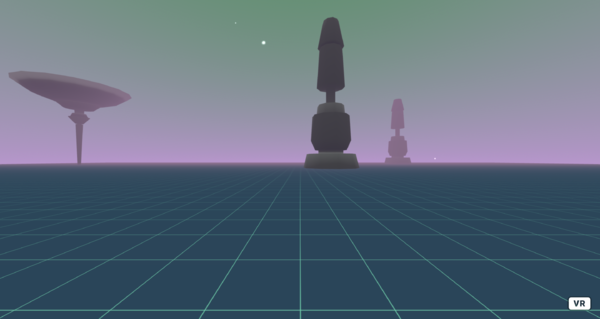
0500-environments-01
[new tab ]
[source ]
 Click to load.
Use keys 'w', 'a', 's', 'd' to move around.
Mouse to look around.
This element is used in a slightly different way from previous ones: we use a generic <a-entity> and them inside the environment attribute we define the various details of the environment (preset is just one). Also note that the syntax is parameter:value instead of parameter=value.
- Explore the different presets by running the example and changing the preset name.
Customizing the environment
The Environment component allows various customizations beyond the available presets. Let's take a look at two: Dressing and Play area.
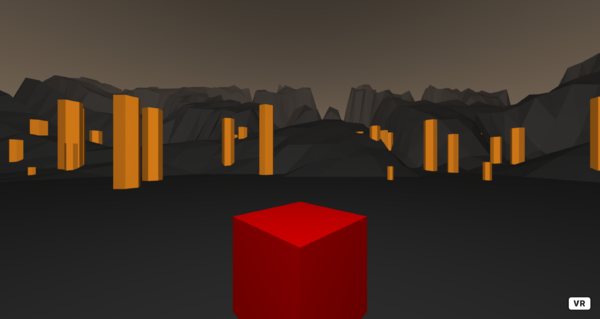
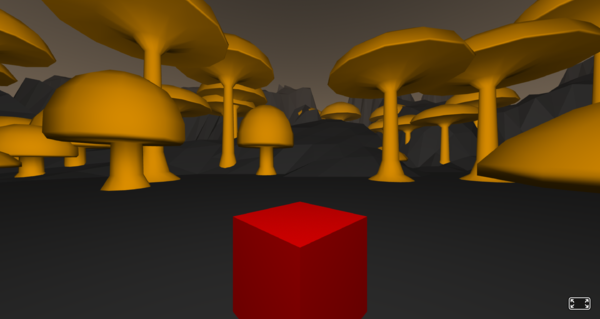
Dressing
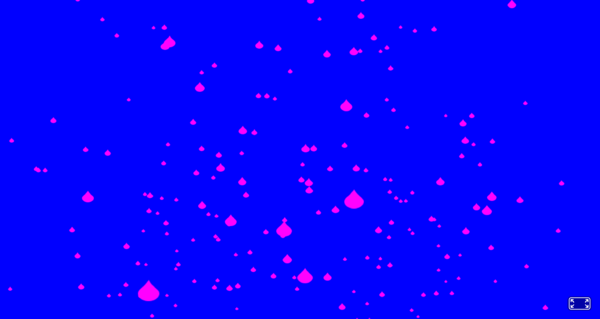
Dressings are additional objects scattered throughout the environment. Various parameters allow us to control these:
- The
dressingparameter allows us to define the type of object. Possible value are:- none
- cubes
- pyramids
- cylinders
- towers
- mushrooms
- trees
- apparatus
- torii
- The
dressingAmountparameter controls the number of objects. - The
dressingColorparameter controls de color of the objects. - The
dressingScaleparameter controls the height of the objects in meters.
For example:
<a-entity environment="preset: goldmine;
                       dressing: mushrooms;
                       dressingAmount: 20;
                       dressingColor: orange;
dressingScale: 1"></a-entity> 0500-environments-02-dressing
[new tab ]
[source ]
 Click to load.
Use keys 'w', 'a', 's', 'd' to move around.
Mouse to look around.
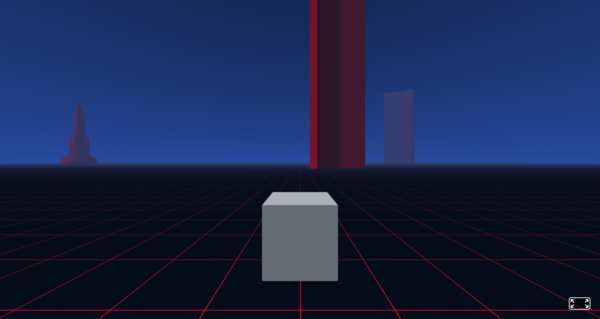
Play area
The play area is an area cleared of objects in the center of the environment. In this area we can then add our own 3D objects to create our scene.
The playArea parameter defines a radius where the ground is flat and no objects are automatically placed. This allows us to create an environment and then populate it with our own objects:
<a-entity environment="preset: tron; playArea: 10"></a-entity> 0500-environments-03-playarea
[new tab ]
[source ]
 Click to load.
Use keys 'w', 'a', 's', 'd' to move around.
Mouse to look around.
Particle System Component
The Particle System component allows us to create what is usually called… particle systems: a number of small objects with pre-defined movement that live for a short time.
Particle systems are also an external component that requires the following <script>:
<script src="https://cdn.jsdelivr.net/gh/c-frame/aframe-particle-system-component@1.1.4/dist/aframe-particle-system-component.min.js"></script>Once we include the script, we can use a generic <a-entity> and configure the particles in the particle-system attribute, in a similar way as we did with the Environment component.
The most simple way is to use a particle system preset. There are presets for rain, stars, dust, snow, and colors.
<a-entity particle-system="preset: snow"></a-entity>0500-environments-04-particles
[new tab ]
[source ]
 Click to load.
Use keys 'w', 'a', 's', 'd' to move around.
Mouse to look around.
In the example above, we are using algo the Environment component, but we can use the Particle System without the Environment.
- In the example above, try changing the preset (we may need to adjust the sky's color to see the particles).
Customizing the Particle System
Color and Size
To change the particle's color just add the color parameter to its configuration (note that just like in the Environment component, different parameters must be separated by a semi-colon ;). To change the size, we use the size parameter:
<a-entity position="0 2.25 -15" particle-system="preset: rain; color: red; size: 5"></a-entity>0500-environments-05-particles-color
[new tab ]
[source ]
 Click to load.
Use keys 'w', 'a', 's', 'd' to move around.
Mouse to look around.
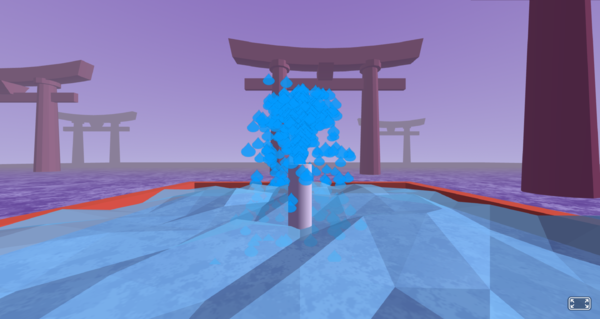
Making a fountain
To make a particle system that resembles a fountain we need to control additional parameters like the velocity, and texture applied to the particles:
<a-entity position="0 1.25 -15" particle-system="velocityValue: 0 12 0; velocitySpread: 0 0.1 0; texture: https://cdn.rawgit.com/IdeaSpaceVR/aframe-particle-system-component/master/dist/images/raindrop.png; color: red; opacity: 1"></a-entity>0500-environments-07-particles-fountain
[new tab ]
[source ]
 Click to load.
Use keys 'w', 'a', 's', 'd' to move around.
Mouse to look around.
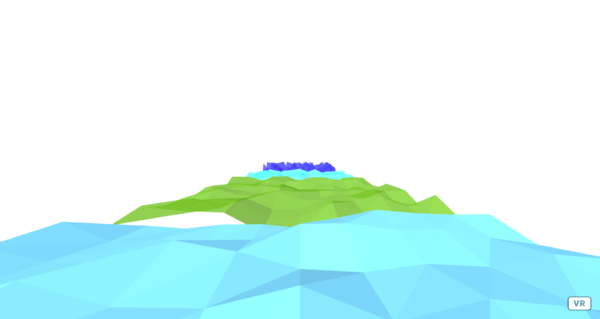
Oceans
Oceans are also an external component, so we need to add another <script> tag to our code (inside the <head> element):
<script src="//cdn.rawgit.com/donmccurdy/aframe-extras/v7.5.0/dist/aframe-extras.min.js"></script>Once we add the script, we have access to another primitive: <a-ocean>:
<a-ocean position="0 0 0" width="10" depth="10" opacity="1"></a-ocean>This primitive creates a rectangular surface that is animated, and mimics the ocean waves. We can control the position, and size of this surface with the position, width, and depth attributes.
We can also control the speed and amplitude of the waves with the speed and amplitude attributes.
0500-environments-08-oceans
[new tab ]
[source ]
 Click to load.
Use keys 'w', 'a', 's', 'd' to move around.
Mouse to look around.
Combining Everything
0500-environments-10-environ-ocean-fountain
[new tab ]
[source ]
 Click to load.
Use keys 'w', 'a', 's', 'd' to move around.
Mouse to look around.
Exercises
Environments-01
Create a forest environment using the Environments component. Add cylinder textured with a tree bark texture
Environments-02
Using the Ocean component, create a scene with a "lake" and a boat on it. Use your imagination to create a boat-like object using simple shapes.
Environments-03
Using the Particle System and the Environment components, create a scene with a forest and strong wind that carries particles horizontaly across the screen.
References
- Environment Component
- https://github.com/feiss/aframe-environment-component/
- Include:
<script src="https://unpkg.com/aframe-environment-component@1.3.7/dist/aframe-environment-component.min.js"></script>
- Particle Systems Component
- https://github.com/c-frame/aframe-particle-system-component
- Include:
<script src="https://cdn.jsdelivr.net/gh/c-frame/aframe-particle-system-component@1.1.4/dist/aframe-particle-system-component.min.js"></script>
- Oceans Component
- https://github.com/donmccurdy/aframe-extras/tree/master/src/primitives
- Include:
<script src="//cdn.rawgit.com/donmccurdy/aframe-extras/v7.5.0/dist/aframe-extras.min.js"></script>
- A-Frame Third-party Components