2. Introduction to this course
This chapter explains how you should copy and use the starter Glitch project. It also describes how this course is structured in the website that you are currently using.
2.1 Starter Glitch project
Login into Glitch. Open the following webpage: https://uc-webvr-starter.glitch.me/ and then click on the top-right dropdown button and select Remix on Glitch (Figure 2.1).

The starter project has already all the files created for the various exercises for this course. If you preview the project, we will notice also that it has links to all exercises and to the project that you will develop during the course.
Of course you can, and should, add other files as you go along the course, perhaps putting them in another folder to keep the project clean and structured.
Before moving on, you should rename the project to something meaningful. Use your name in the project's name: that will make it easier for the instructor to know to whom the project belongs.
2.2 Learn the structure of the course's website
The chapters and examples about A-Frame are also hosted on Glitch.com and it's important that you understand how things are structured.
The address of course website is, of course, https://aframe-course.glitch.me/. The course is structured into various chapters that you can browser on the left side (Figure 2.2).

Each chapter features an explanation of the concepts and functions with images and running examples. These examples are important because they allow you to understand by reading functioning code and they can serve as a basis for your own work.
2.2.1 Modify an example
Each chapter has a number of examples that you can copy and modify. To do that, you need to create a new file in your own project and then copy and paste the contents of the example. The following example is similar to the ones that appear throught the various chapters. Notice the source link at the top. If you click there, you will open a new tab with the source code for that example.
Let's copy the source code of the following example and edit that so that is displays the cube with an image you will upload later:
0010-intro-01
[new tab ]
[source ]
 Click to load.
Use keys 'w', 'a', 's', 'd' to move around.
Mouse to look around.
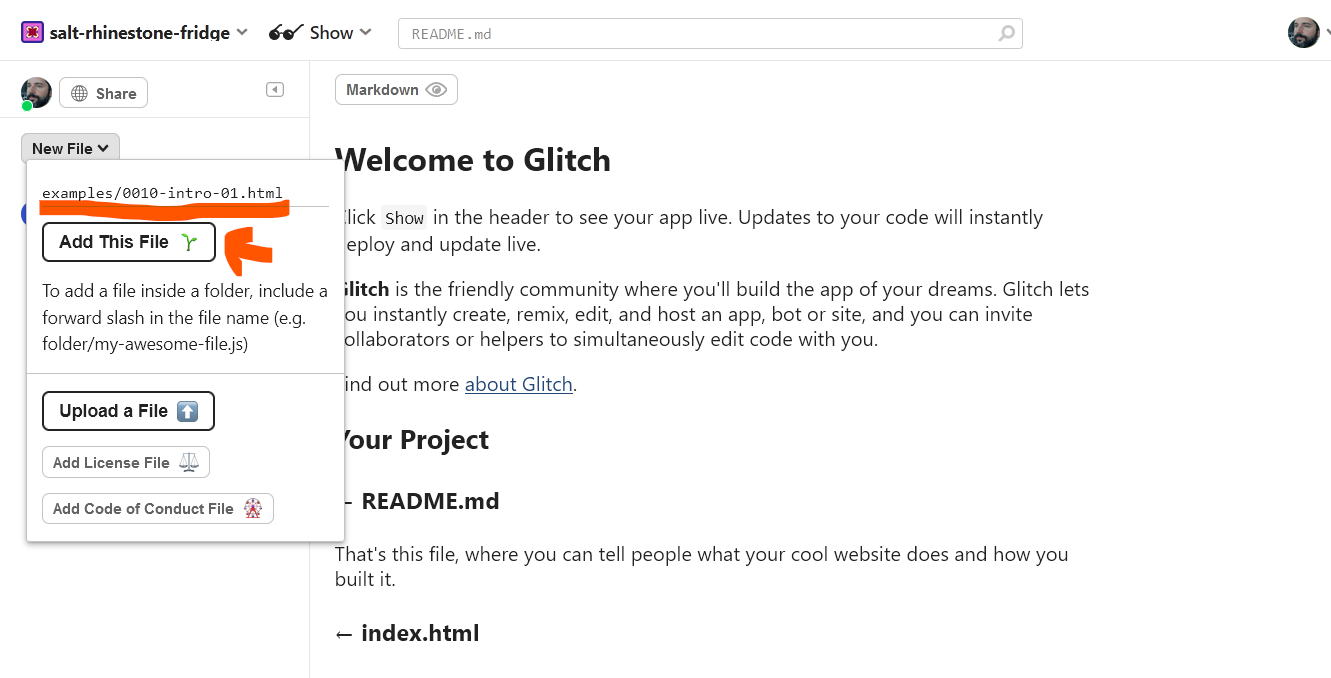
- Go to your project and create a new file (Figure 2.3). To keep your project organized, you should name your files so that they will end up inside folders. In Figure 2.3, I named the file
examples/0010-intro-01.html– this will create a new file inside the folderexamples. It is important also to add the file extension to the file name (.html).
- Go to the example you wish to copy, and click on the
Sourcelink to open a new tab with the source code (Figure 2.4)
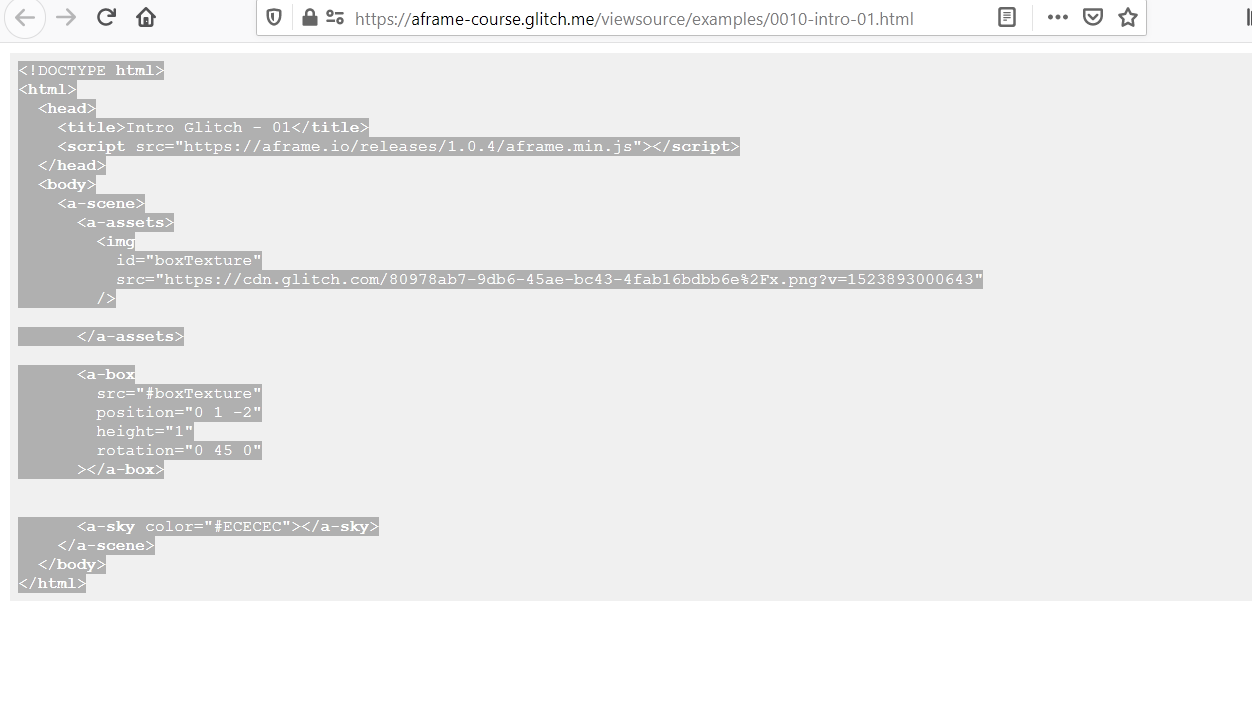
Copy all the code.
Go back to the empty file you just created in your project and and paste the code.
2.2.2 View the results
- Click on the
Preview -> Preview in a new windowbutton at the bottom of the Glitch Editor. - This will open the default page
index.htmlwhere you can find a link to the examples folder.
2.1. Click theExampleslink and then click on the name of the file you have just created.
2.2. Alternatively, you can edit the address in the address bar of your browser and write the full address (Figure 2.5).
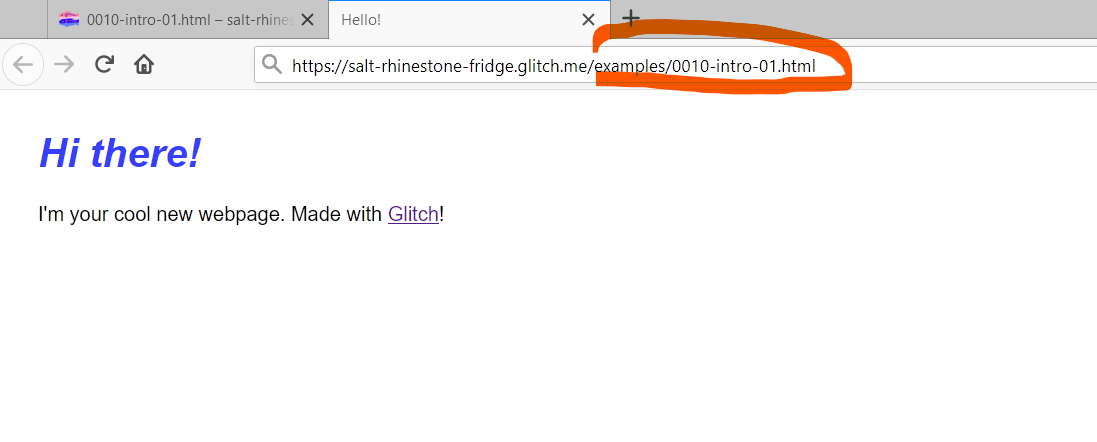
After you enter the address you will see the results (Figure 2.6).
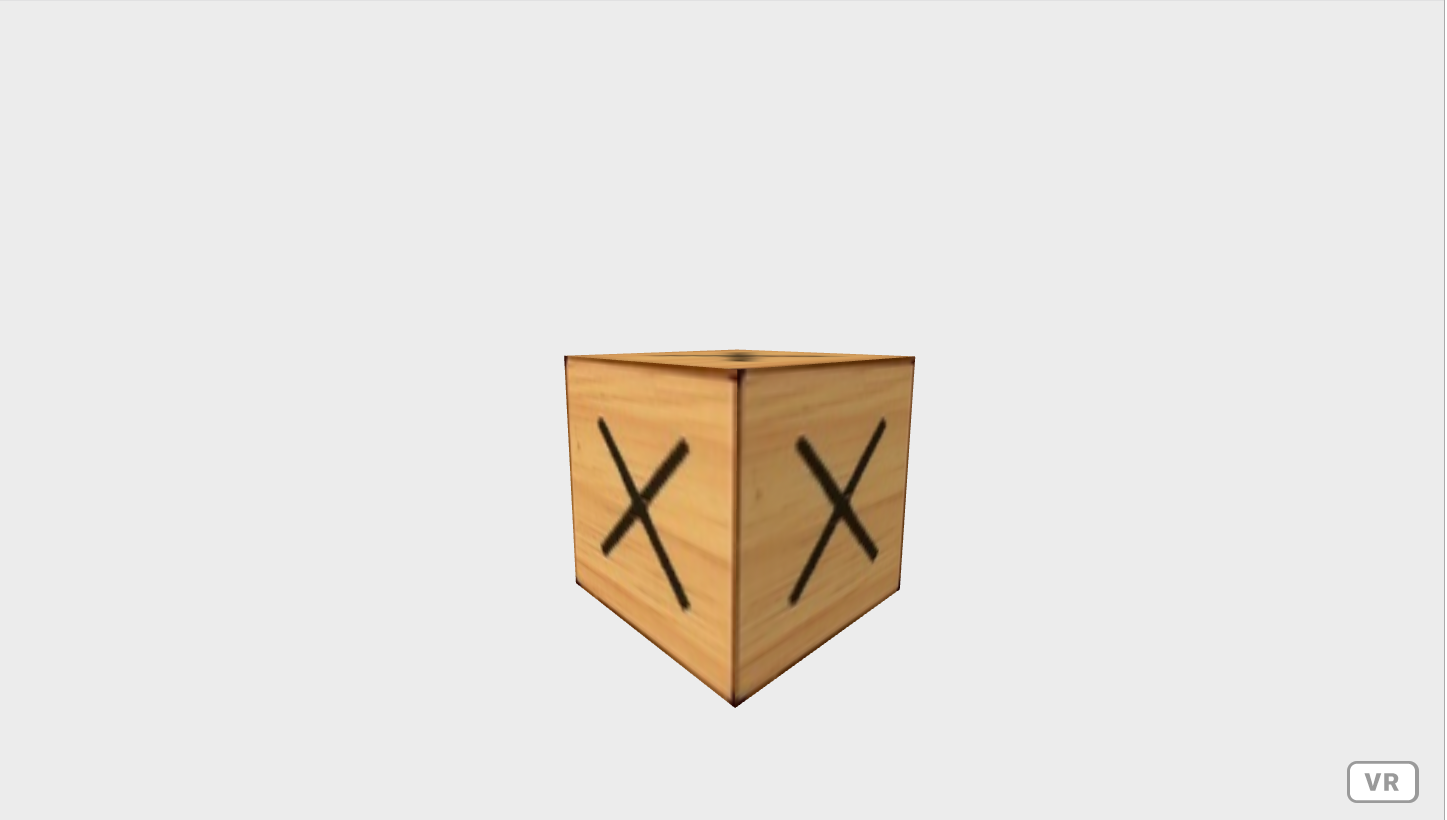
2.2.3 Change the image on the cube
Look for an image in your computer and upload to the Assets in Glitch by following these steps:
In your Glitch project, go to the Assets special folder and drag and drop (or use the
Upload an assetbutton) an image file from your computer (Figure 2.7).

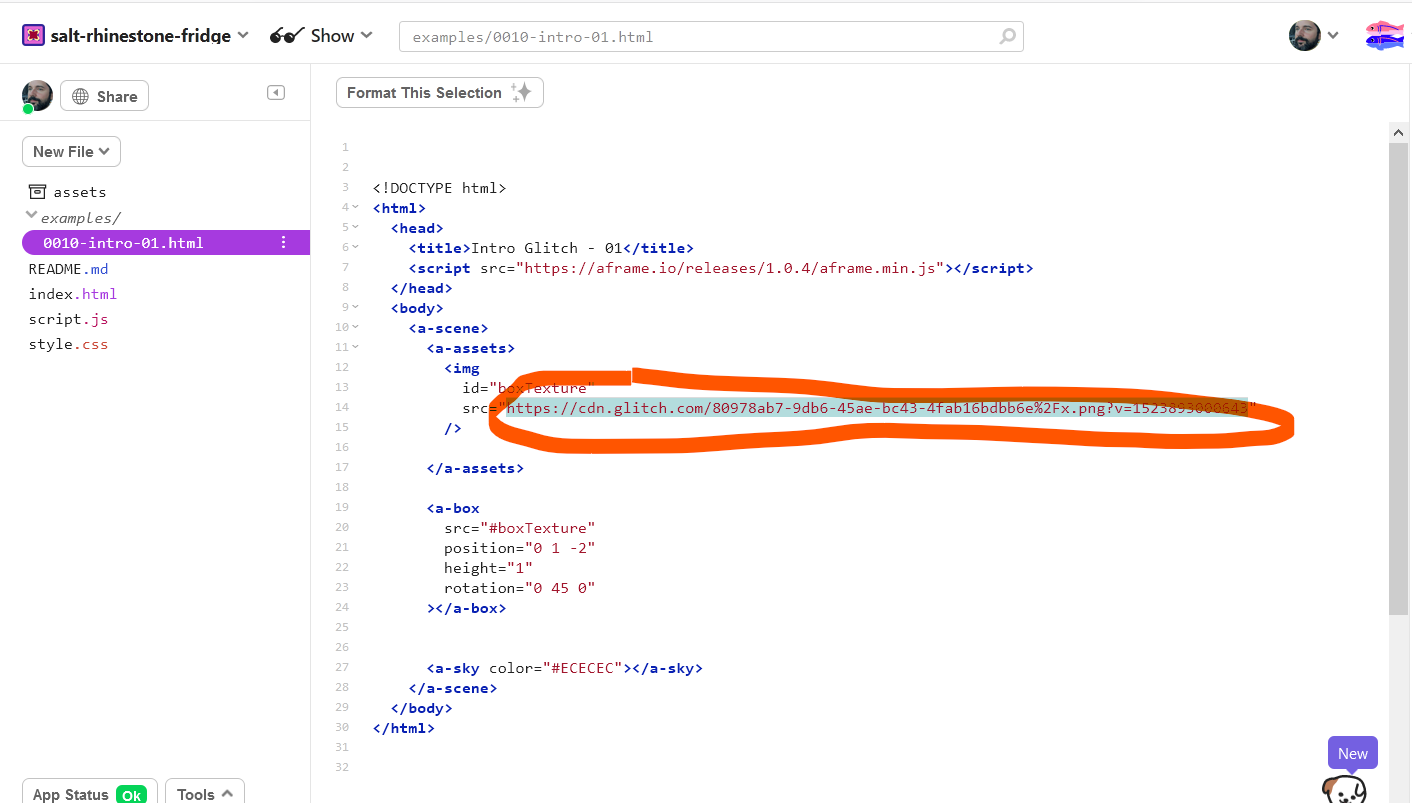
- After you have uploaded the image click on it and copy the URL of the image (Figure 2.8).

- In your Glitch project, locate the file you have just added and paste the URL you have just copied into the
srcattribute (Figure 2.9).
- Reload the preview tab and you should see the cube with a new texture.
Exercises
For each exercise, you should use a differente HTML file on your Glitch project.
Ex2.1 Modifying an example
Repeate the steps from section 2.2.1 Modify an example and copy the example to the exercise file ch02/ex2.1.html.
Upload a new image to the Assets special folder and replace the URL (src attribute) of the example by the URL of the image you uploaded.